How do I use the filters and name search?
Last updated over 6 years ago
Paperless Payments allows you to quickly set or change rates and other payments for all, some or one artiste. This page will show you how to do that by using the filter dropdown and artiste search.
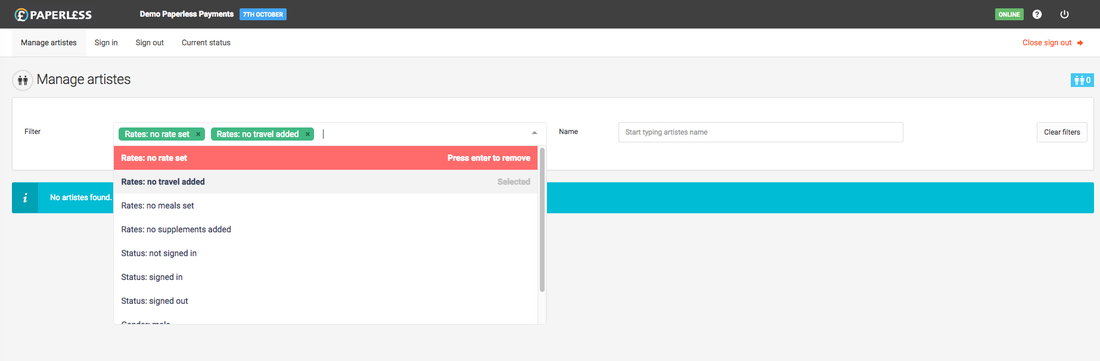
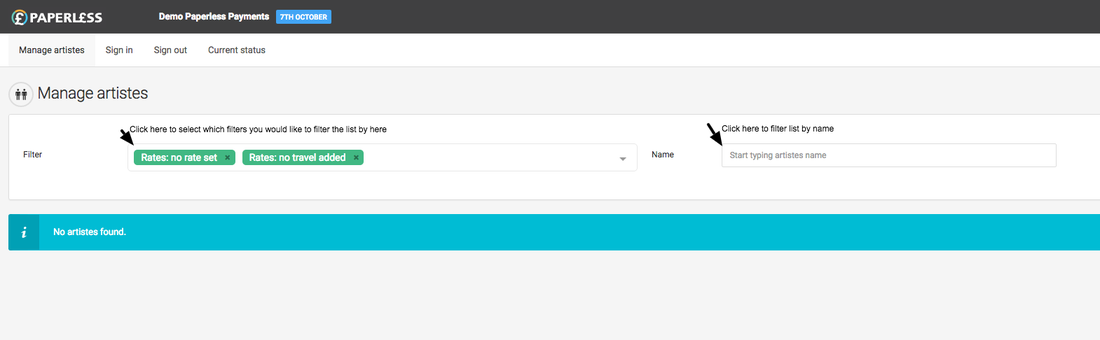
From the "Manage artistes", "Sign in" or "Sign out" screens , you can filter the list of artistes. The options available to you in the filter will correspond to the values for the day that you’re looking for and as well as breaking things up by stage, unit, character, transport, call time and gender we also have additional helper options so that you can find all artistes with “no rate set” for example or “no meals set”
Setting rates for all artistes
To set rates for all artistes first “select all” artistes in the list and then select the button next to it. From here select what you would like to set, for example, the “rates”, select your rate and update. You can continue to set whatever you need for all artistes by clicking the button again.
Setting rates for a subset of artistes
There may be situations where you need to add or update rates for a smaller subset of artistes. To do this use the filter dropdown options to find the group of artistes you want to set rates for.
A powerful feature of the system is that you can use multiple filters at once.
Therefore if you know that all artistes who are “filming” on the “main unit” who are starting at “7.00 AM” will be on a “continuous working day” rate - you can use the filters to find all the artistes that this applies to and then set the rate for them.
Once you’ve finished you can use the “Clear filters” button to return to the list of “all artistes”
Removing rates
If you want to remove a line item for a subset of artistes you can follow the same set of steps.
For example, you may have already added "broken lunch" to all artistes and then later realise that you should have only added it to those who are “filming”. To remedy this you would first remove the payment for all artistes (“select all”, “Remove meals”, switch “Broken lunch” to “remove” and “Remove meal penalties”) and then add it to only those we want it for (filter “Filming”, “Select all”, “Add meal”, switch “broken lunch” to “Add” and then “Add meal penalties”)
Setting rates for individual artistes
Either find the artiste you want to apply the rate to from the list or alternatively find them using the “Name” filter box. You can simply start typing their name and then select “Update” and “Rates”.
From the pop-up, you can then start applying rates, travel and meal penalties.
Switching between screens
When you switch between the “Sign-in”, “Sign-out” and “Current Status” screens on an open day, the filters will remain in place which allows you to easily manage groups of artistes and perform different functions on them.
For example, from the current status screen here you may see that there are some artistes not yet signed in. By clicking in you will be taken to the sign-in screen with just those artistes displayed. If you wish you could then sign them in.
Alternatively, if you wanted to mark them as a “no-show” you would click the “manage artistes” tab, the filters will stay in place so that you could select “Update” and “Don’t pay artiste”